If you’ve ever watched a fast, precise robot stack boxes on a factory line, place microchips onto circuit boards, or even arrange delicate pastry in a commercial bakery, chances are you were looking at a Delta Robot. These parallel-link robots have dominated high-speed pick-and-place and precision assembly tasks for decades, but programming one isn’t just about typing a few lines of code—it’s about understanding their unique mechanics, calibrating every moving part, and balancing speed with accuracy. As a Delta Robot supplier, I work with engineers and small business owners every day who assume these machines are too complex to code in-house, or that pre-built programming tools will never fit their specific workflow. Today, I’m breaking down exactly how to program a Delta Robot, from pre-programming setup to testing and troubleshooting, no advanced PhD required. Delta Robot
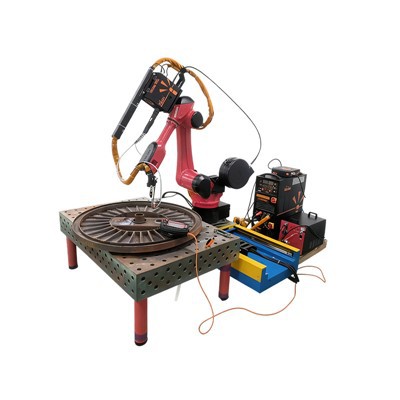
First, let’s start with a quick refresh on what makes Delta Robots different from traditional 6-axis articulated robots. Unlike their chain-like, multi-jointed counterparts, Delta Robots have three parallel arms connected to a moving end effector (the part that actually grips or manipulates items) mounted above. This parallel design gives them unbeatable speed—they can move at rates up to 10 meters per second, way faster than most articulated robots—because each arm only moves in a limited, arc-shaped path, and their combined motion translates to precise, linear movement at the end effector. That speed and precision is why they’re used in everything from pharmaceutical packaging to chocolate molding, and why so many of our clients come to us needing help turning that raw mechanical power into actual work.
Before you even open a programming interface, there are two non-negotiable pre-programming steps that will save you weeks of headaches. The first is mechanical calibration. I can’t tell you how many times I’ve seen a client spend hours writing a complex pick-and-place path, only to realize the robot is off by 2mm because the arm lengths were miscalibrated. To calibrate a Delta Robot, you need to zero each of the three arm joints, then set the home position of the end effector. Most modern Delta Robots come with a teach pendant (a handheld control device) that guides you through this process: you move the end effector to a known reference point (like the center of the robot’s work envelope), then the controller records that position as zero. You’ll also need to calibrate the tool center point (TCP)—the exact spot on the end effector where the grip or suction cup makes contact with parts. For a suction cup that’s 10mm off-center from the arm’s mounting point, that small offset will throw off every movement, so take 10 minutes to double-check that step. The second pre-programming step is defining the work envelope. Delta Robots have a circular, dome-shaped work area, and trying to program movements outside of that will cause the arms to jerk, stall, or even damage the robot. Map out all the points where you need to pick parts, place them, and any intermediate waypoints, and make sure they all fit within the calculated radius and height of your specific Delta Robot model.
Now, moving into the actual programming. The great news is that modern Delta Robot controllers don’t require you to write low-level code from scratch. For most of the systems we supply, we use standard industrial robot programming languages like G-code, or visual programming tools that use drag-and-drop blocks, which are perfect for small to medium production runs or for users who don’t have a background in robotics. Let’s walk through a simple, practical example: programming a pick-and-place task for a bakery that’s moving cookie dough from a conveyor belt to a baking tray.
First, you’ll need to “teach” the key positions your robot will use. This is where the teach pendant comes in, and it’s way simpler than it sounds. Start by moving the end effector above the conveyor belt, right above the spot where the cookie is moving into view. Pause there, and save that position as P1 (Pick Position 1). Next, move the end effector down to actually touch the cookie (or 1mm above it, to avoid squishing the dough) and save that as P2—this is where the suction cup will engage. Then, move the end effector up 50mm to clear the conveyor and any obstacles, and save that as P3. Finally, move the end effector to the first empty spot on the baking tray, down to place the cookie, and save that as P4, then move back up to P5 to clear the tray.
Once you have these positions saved, you can start building the movement sequence. In most visual programming interfaces, this is as easy as dragging and dropping commands in order: Move to P1 → Move to P2 → Engage suction cup → Move to P3 → Move to P4 → Release suction cup → Move to P5. That’s the core of the task. But if you’re using G-code or a more custom program, the syntax would look something like this for a basic sequence:
G0 X0 Y0 Z100 F5000 (Moves to home position, Z is 100mm above home, feed rate 5000mm per minute)
G0 X200 Y0 Z50 (Moves to P1, above the conveyor)
G0 X200 Y0 Z10 (Moves to P2, 10mm above the cookie)
M08 (Turns on suction)
G0 X200 Y0 Z50 (Moves back to P3, clearing conveyor)
G0 X-150 Y200 Z10 (Moves to P4, above baking tray)
G0 X-150 Y200 Z0 (Moves down to place cookie)
M09 (Turns off suction)
G0 X-150 Y200 Z50 (Returns to clear tray)
Now, here’s where most new programmers make mistakes: speed and acceleration settings. Delta Robots shine at high speeds, but setting them too high will cause vibration, which ruins precision, especially for delicate parts. For a soft cookie, you’ll want a slower feed rate than you would for a rigid plastic part. Our suppliers include built-in speed presets for common tasks, but I always recommend starting at 60% of the maximum speed, then testing to see if parts stay in place and the robot doesn’t vibrate. You can also adjust acceleration—Delta arms can handle quick starts and stops, but exceeding 80% of their rated acceleration will trigger a safety stop, which is frustrating mid-production.
Once you have the basic movement sequence programmed, you’ll need to add logic to make it work with your production line. Most Delta Robot setups are integrated with conveyors, sensors, and other equipment, so the robot needs to respond to real-time input. For example, if you’re picking parts from a moving conveyor, you can’t program fixed positions—you need to track the conveyor’s speed to predict where the part will be when the robot arrives. Most controllers have an “encoder input” that syncs the robot’s movement to the conveyor’s encoder, which counts how fast the belt is moving. In the example of the cookie line, this means you don’t have to adjust the robot’s code every time the conveyor speed changes—its logic will automatically adjust the pick position based on the encoder data. For logic like “wait for a part sensor to trigger before picking,” that’s another simple block in visual programming: add a “Wait for Sensor” command before the Move to P1 step, so the robot only acts when a cookie is in the right spot.
Testing and debugging is the final, most critical step, and one that I walk every client through when they’re programming their first Delta Robot. Never run a full production cycle at 100% speed on your first test—start with a dry run where you move the end effector through the programmed path without engaging any tools (suction cups, grippers, etc.) to check for collisions. Move the robot at 20% speed first, then gradually increase it to 50%, then 75%, watching for any jerky movements or deviations from the planned path. If the robot misses a pick, check two things first: did you correctly calibrate the TCP? A misaligned suction cup can make the end effector pick at a slightly off angle, which makes it miss the part. If calibration is correct, check your speed settings—too much speed can make the end effector overshoot the target position.
Once the dry run works, test with actual parts at low speed, then work up to production speed. If you’re working with small, high-precision parts like microchips, you might need to add a “approach path” that slows the robot down in the last 10mm before placing, to avoid knocking the part off the end effector. For more complex tasks, like sorting parts by size or color, you can add vision system integration, which lets the robot use cameras to identify parts, adjust its pick position, and sort them accordingly—all programmable through the same interface you use for basic movement.
I know programming a Delta Robot can feel overwhelming at first, especially if you’re used to simpler machines or haven’t worked with industrial robotics before. But the good news is that modern Delta Robot programming tools are designed to be accessible, and as a supplier, we provide all the training, documentation, and support you need to get up and running quickly. Whether you’re a small bakery scaling up production, a pharmaceutical company packaging sensitive vials, or a logistics firm automating order fulfillment, a well-programmed Delta Robot can cut production time in half, reduce errors, and free up your team to focus on higher-value work.
If you’re ready to integrate a Delta Robot into your operations, or if you have questions about programming, calibration, or matching the right Delta Robot model to your specific tasks, our team is here to help. We’ve worked with hundreds of businesses across industries to build custom programming solutions that fit every workflow, no matter how simple or complex. Contact us today to discuss your project and get started on your automation journey.
Nail Gun Robot References
- Craig, J. J. Introduction to Robotics: Mechanics and Control. Pearson Education, 2005.
- Spong, M. W., Hutchinson, S., & Vidyasagar, M. Robot Modeling and Control. John Wiley & Sons, 2006.
- Delta Robot Technical Handbook. Industrial Robot Manufacturers Association, 2021.
- "Parallel Robots for High-Speed Manipulation." IEEE Transactions on Robotics, vol. 32, no. 2, 2016, pp. 289-302.
Dongguan Chuanglida Intelligent Equipments Co., Ltd.
As one of the most professional delta robot manufacturers and suppliers in China, we also support customized service. Please feel free to buy discount delta robot in stock here from our factory. For price consultation, contact us.
Address: Room 201, Building 2, No. 61, Shachang 1st Road, Dalang Town, Dongguan City, Guangdong Province
E-mail: haoguangli001@outlook.com
WebSite: https://www.boruntestech.com/
