When I first started my vending machine supply business a decade ago, I made a mistake that still haunts me with every delivery I oversee. A small local café owner bought a used machine from an online listing, skipped any hands-on testing, and spent three hours driving to pick it up—only to find the coin mechanism was dead, the refrigeration unit for the snack compartment was blowing warm air, and the bill validator wouldn’t accept any denominations. She refused to take it, wasted her time and gas, and told every other local business she knew to avoid my early operations because I’d “sold her a dud.” That experience taught me that testing a vending machine before purchasing isn’t just a good idea—it’s non-negotiable, especially when you’re investing your business’s time and money into a machine that will serve your customers day in and day out. As a vending machine supplier who’s spent years repairing, refurbishing, and installing these units, I’ve put together a step-by-step testing process that works for every type of buyer, whether you’re picking up a used unit off a marketplace or ordering a brand-new machine from a reputable supplier like mine. Vending Machine
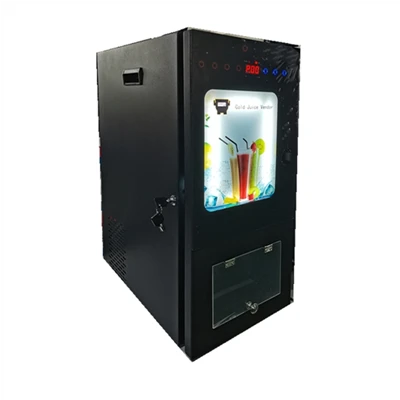
First, start with the physical and structural check before you even plug the machine in or insert any form of payment. This is the part most buyers skip, and it’s where so many hidden issues hide. When you’re on-site with a machine, walk around it thoroughly. Check the exterior for dents, scratches, or rust—rust might seem minor, but it can seep into internal wiring over time, causing electrical shorts that will shut your machine down during peak hours. Open the service door (for new machines, your supplier will walk you through how to do this; for used units, ask the seller to show you) and inspect the interior. Look at the frame: if there’s bending or loose bolts, that’s a sign the machine was dropped in transit or mishandled, which can throw the product dispensing system out of alignment. Next, check the product shelves and trays. For snack machines, make sure the metal or plastic trays that hold the products are intact, with no cracks or warps that would cause a bag of chips to get stuck mid-delivery. For combo machines that offer both snacks and drinks, the refrigeration unit’s interior should be clean and free of mold or mildew—mold in the drink compartment isn’t just unhygienic; it can spread to the products, leading to customer complaints or even health code violations.
Don’t forget to check the payment system’s housing too. Bill validators and coin mechanisms are the most commonly replaced parts on vending machines, and a damaged housing can mean moisture gets inside, causing corrosion. I once sold a refurbished machine to a school district that complained the bill validator broke within a week—turns out, the previous owner had stored the machine in a leaky garage, and the housing had rusted so bad water was seeping into the bill acceptor. That’s the kind of issue you can catch during a physical inspection if you’re looking closely.
Once you’ve completed the structural check, move on to the electrical and operational tests, which are the most critical parts of your pre-purchase evaluation. If you’re buying a new machine, this is straightforward: plug it in and make sure it turns on, but don’t stop there. For used machines, always test it with a temporary power source if possible—some older machines have faulty cords that can cause fires, so never just plug it into the café’s or office’s outlet. When the machine is powered on, listen for unusual noises. A faint hum is normal for refrigeration units, but a grinding, squealing, or rattling noise is a red flag. That grinding sound usually comes from a worn-out motor in the dispensing system, which will cost you hundreds of dollars to replace and will lead to frequent dispensing failures.
Next, test each product slot one by one. Most machines have 8 to 12 slots per column, so take your time—don’t just test one or two. For a snack slot, insert a test coin or bill (ask your supplier for a test coin if you don’t have one) and select the slot. Watch to see if the product rolls out smoothly, without getting stuck, and the door closes properly after it’s dispensed. For a drink slot, the same rule applies: select a drink, make sure it drops to the retrieval tray, and that the tray doesn’t get jammed. If a slot fails to dispense, don’t dismiss it as a minor issue. It could mean the dispensing gear is worn out, which will require a part replacement, or that the slot is misaligned, which is a quick fix—but if multiple slots fail, that’s a sign the machine’s core dispensing system is on its last legs.
Then there’s the refrigeration test, which is non-negotiable for any machine that sells perishable items. If you’re testing a snack and drink combo machine, you need to verify that both the snack compartment (which is usually room temperature, but some specialty snack machines are refrigerated) and the drink compartment are holding the correct temperature. Grab a thermometer (I keep a few in my service van for exactly this) and place it in both compartments, then set the machine to its normal operating temperature. For drink compartments, the FDA recommends keeping refrigerated products at 40°F or below, so if your thermometer reads higher than that, the refrigeration unit is failing. A common issue here is a dirty condenser coil—this is the part that cools the refrigerant, and if it’s covered in dust and debris, the unit has to work harder, leading to higher electricity bills and a shorter lifespan. You can check the condenser coil during your structural inspection: it’s usually on the back or bottom of the machine, and if it’s caked in dirt, that’s a quick fix, but if the compressor itself is hissing or leaking refrigerant, that’s a major repair that can cost more than half the machine’s value.
Now, the payment systems—this is where you’ll lose money every day if it’s not working properly, so don’t rush this test. Start with the coin mechanism: insert coins of denominations, and make sure the machine counts them correctly, returns any invalid coins, and registers the total amount on the display. A common issue with older coin mechanisms is that they don’t accept newer coins, or they “cheat” by not counting some coins, which will lead to you losing revenue every time a customer uses change. Next, test the bill validator. Insert bills of different denominations, including $1, $5, and $10 bills, to make sure the machine reads them correctly. A faulty bill validator will often reject bills, leading to frustrated customers who won’t use your machine again. If the machine uses contactless payment methods like Apple Pay or Google Pay, test that too—most newer machines have a card reader or tap-to-pay feature, and if that’s not working, you’re missing out on a huge number of customers who prefer cashless payments. I always tell buyers: if your machine doesn’t accept contactless payments, you’re leaving up to 30% of potential revenue on the table, so this test is extra important.
Another often-overlooked test is the inventory and tracking system, especially if you’re buying a newer machine that comes with digital tracking. Many modern vending machines have software that lets you track sales, inventory levels, and even machine performance from your phone or computer. If that’s a feature you’re investing in, make sure the system is connected and working during your test. Ask the seller or supplier to show you how the dashboard works: can you see real-time sales data? Does it alert you when a product is out of stock? If the software is glitchy, you’ll end up with a machine where you can’t track inventory, leading to overselling or running out of top-selling products, which drives customers away. Even if you’re buying a basic, older machine without digital tracking, check the product selection display to make sure it matches what’s actually in the machine. Some sellers will place extra products in the slots that aren’t wired to dispense, so the display shows more items than you’ll actually be able to sell.
Once you’ve run through all these tests, it’s time to ask about the machine’s service history. A reputable supplier will have full records of any repairs, part replacements, and maintenance done on the machine. For example, if the coin mechanism was replaced six months ago, that’s a good sign—you know that part is new. If the seller can’t provide any service records, that’s a red flag. As a vending machine supplier, I always keep detailed records for every machine I sell, because it builds trust with buyers. If a machine has no service history, you’ll have to assume the worst: that every part is original and nearing the end of its lifespan, which means more frequent repairs down the line.
Finally, don’t forget to consider the cost of repairs and ongoing maintenance. Even a machine that passes all your tests will need maintenance: cleaning the condenser coils, replacing worn belts, and updating software if it has a digital system. When you’re testing, ask the seller or supplier what regular maintenance costs are for that specific model. For example, older machines with mechanical coin mechanisms cost more to repair than newer models with contactless payment. If you’re buying a used machine, factor in any necessary repairs into your budget—you don’t want to be surprised by a $500 repair bill a month after purchase.
At the end of the day, testing a vending machine before purchasing is all about avoiding costly mistakes. I’ve seen too many buyers skip these steps, end up with a machine that breaks down weekly, and lose money instead of making it. As a vending machine supplier, I’m proud to offer machines that have been fully tested, refurbished, and serviced before they reach a buyer. But even if you’re working with a supplier like me, I always recommend that buyers do their own on-site testing, because no one knows your needs or your space better than you do.

If you’re ready to invest in a vending machine that fits your business, whether it’s for an office, school, gym, or retail space, don’t make the mistake of skipping the testing process. Reach out to me to discuss your specific needs, and I’ll help you select a machine that’s been fully tested, supported, and ready to generate revenue for your business.
Coffee Vending Machine Parts References
- Vending Industry Association. (2022). Pre-Purchase Inspection Guidelines for Vending Machines.
- Consumer Product Safety Commission. (2021). Safety Checks for Commercial Vending Equipment.
- National Automatic Merchandising Association. (2023). Best Practices for Vending Machine Maintenance and Testing.
- Environmental Protection Agency. (2020). Energy Efficiency Guidelines for Commercial Vending Machines.
Hangzhou Vending Robot Manufacturing Co., Ltd.
As one of the most professional vending machine manufacturers and suppliers in China, we also support custom service. We warmly welcome you to wholesale advanced vending machine made in China here from our factory. If you have any enquiry about cooperation, please feel free to email us.
Address: Floor 4th, Building 5, No.4 Yangcheng Road, Fengdu Industry Park, Pingyao Town, Yuhang District, Hangzhou City, Zhejiang Province, China
E-mail: China_vending@163.com
WebSite: https://www.chinavendingmachine.com/
